Renovating your kitchen is an exciting journey, and with Ikea, it can also be a fun and creative process. However, like any adventure, a successful Ikea kitchen remodel begins with good planning. Let’s dive into the essential steps you need to take before you start tearing out cabinets and picking out new ones.
Assess Your Current Space
Before diving into the world of Ikea kitchen remodel options, take a good look at your current kitchen. Measure your space accurately, noting where your electrical outlets, plumbing, and gas lines are located. This information is crucial for planning your new layout. Think about what you love about your kitchen and what drives you crazy. Are there areas that feel cramped or underutilized? Do you need more storage or counter space? Jot down these thoughts; they’ll guide your decisions later on.
Also, consider the flow of your kitchen. Do you find yourself constantly bumping into things or backtracking to grab utensils? This is your chance to redesign the layout to suit your cooking style. Maybe you want to create a more open space for family gatherings or optimize the work triangle between your sink, stove, and refrigerator. Your Ikea kitchen remodel should reflect how you use your space daily.
Set a Realistic Budget
Next, set a realistic budget for your Ikea kitchen remodel. It’s easy to get carried away with all the stylish options Ikea offers, but you don’t want to end up with an empty wallet and half-finished kitchen. Break down your budget into categories such as cabinets, countertops, appliances, and labor. Remember to include a buffer for unexpected expenses – they always seem to pop up.
Ikea is known for its affordable yet high-quality products, but even so, costs can add up. Be sure to compare prices and look for sales or discounts. Additionally, consider the cost of hiring professionals if you’re not comfortable doing all the work yourself. While DIY can save money, sometimes it’s worth paying for expertise, especially for complex tasks like electrical work or plumbing. Prioritizing your spending will help ensure you get the most bang for your buck.
Research and Gather Inspiration
With your budget in mind, start gathering inspiration for your Ikea kitchen remodel. Browse Ikea’s website, visit their showroom, and flip through home design magazines. Pinterest is also a fantastic resource for collecting ideas and creating mood boards. Pay attention to color schemes, styles, and layouts that catch your eye. This will help you visualize what you want your new kitchen to look like.
Consider not only aesthetics but also functionality. Look at how different kitchens incorporate storage solutions, lighting, and appliances. Take note of clever ideas like pull-out pantries, lazy Susans, or built-in recycling stations. The more inspiration you gather, the easier it will be to make decisions when you start shopping. Plus, it’s a lot of fun imagining all the possibilities for your new space!
Plan Your Layout and Design
Now that you have a clear idea of what you want, it’s time to plan your layout and design. Ikea’s online kitchen planner is a fantastic tool for this. You can input your kitchen’s dimensions, and then experiment with different layouts, cabinets, and appliances. This tool helps you see how everything will fit together and make adjustments before committing to a purchase.
When planning your layout, consider the work triangle – the optimal distance between your sink, stove, and refrigerator. This triangle should be efficient and unobstructed to make cooking and cleaning easier. Also, think about where you’ll store frequently used items. You might want pots and pans near the stove, and dishes close to the dishwasher. Maximizing convenience will make your kitchen more enjoyable to use.
Top Things to Do in Antalya, Turkey
Consult with Experts
Even if you’re planning a DIY Ikea kitchen remodel, consulting with experts can save you time and headaches. Ikea offers design services where professionals can help refine your layout and suggest products that fit your needs and budget. They might point out potential issues you hadn’t considered and offer solutions you wouldn’t have thought of.
Additionally, consider talking to contractors or tradespeople if you plan to hire help. They can provide quotes and timelines, which will be useful for finalizing your budget and schedule. Plus, their expertise can ensure your remodel goes smoothly and meets building codes. Don’t be afraid to ask questions and get multiple opinions. The more informed you are, the better your decisions will be.
Order and Organize Your Materials
Once your design is finalized, it’s time to order your materials. Ikea’s delivery service can bring everything right to your door, saving you multiple trips to the store. Be sure to double-check your order to make sure you have all the pieces you need. It’s also a good idea to keep everything organized as it arrives. Label boxes and keep small parts together so you don’t lose anything.
While waiting for your materials to arrive, prepare your space for the renovation. Clear out your old kitchen and set up a temporary cooking area if necessary. This will make the transition smoother and less stressful. Being organized and prepared will help your Ikea kitchen remodel go off without a hitch.
Prepare for Installation
Finally, prepare for installation day. If you’re doing the work yourself, gather all the tools you’ll need and read through Ikea’s assembly instructions. Enlist the help of friends or family if you need an extra set of hands. Make sure you have all the necessary permits and inspections lined up if required.
If you’ve hired professionals, coordinate with them to ensure everyone is on the same page. Clear the work area and make sure they have easy access to the kitchen. It’s also helpful to have a timeline and check-in regularly to ensure everything is progressing smoothly.
The Role of a Project Management Consultant in Construction
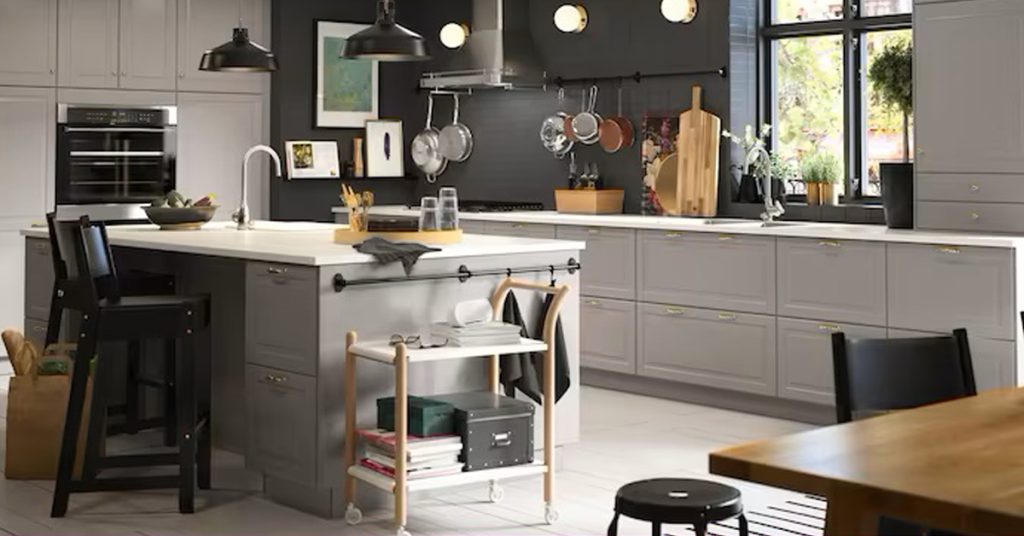
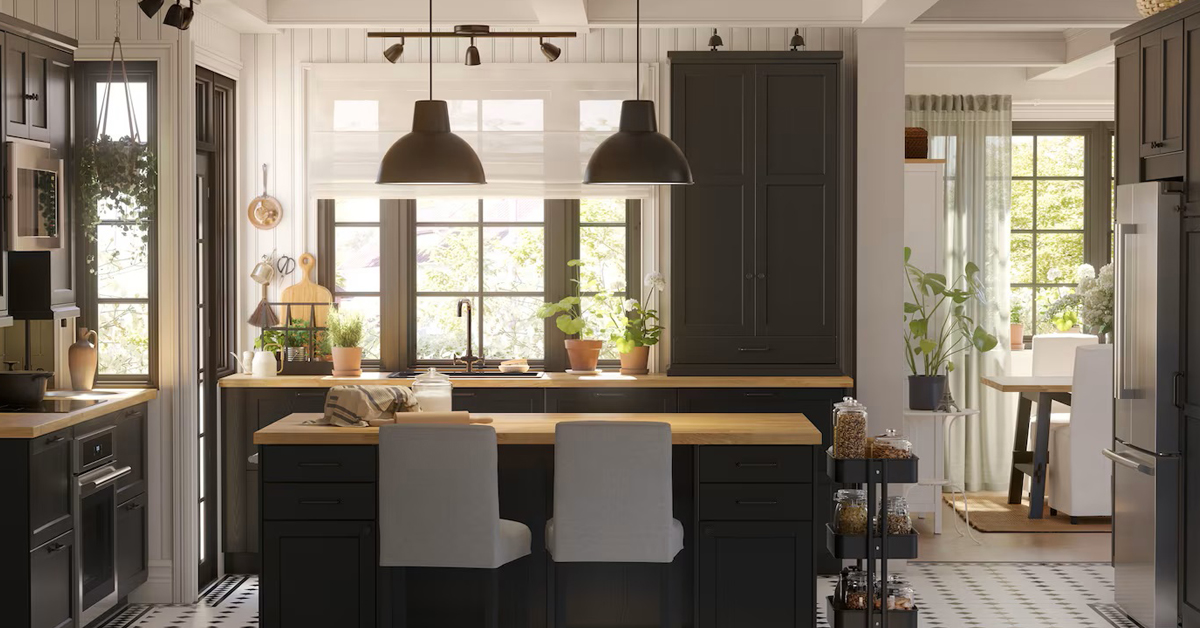
Photo Credit: ikea Kitchen
Choosing the Right Layout: Best Ikea Layouts for Various Kitchen Sizes and Shapes
When it comes to an Ikea kitchen remodel, choosing the right layout is crucial. Whether you have a cozy galley kitchen or a spacious open-concept design, Ikea has solutions that can fit your needs perfectly. Let’s explore some of the best Ikea layouts for different kitchen sizes and shapes, ensuring you get the most out of your remodel.
Galley Kitchens: Maximizing Efficiency
Galley kitchens are all about efficiency. With two parallel walls, they can sometimes feel a bit cramped, but with the right layout, they can be incredibly functional. Ikea’s modular systems are perfect for making the most out of this narrow space. Start by placing your stove and sink on one side, and use the opposite wall for storage and prep areas.
To avoid feeling boxed in, consider Ikea’s open shelving options. They make the space feel larger while providing easy access to frequently used items. Pull-out drawers are another great choice, offering ample storage without taking up too much space. Keep your countertops clear by utilizing Ikea’s hanging storage solutions for pots, pans, and utensils. This setup keeps everything within reach, making cooking a breeze.
L-Shaped Kitchens: Versatile and Functional
L-shaped kitchens are incredibly versatile and can fit into a variety of home styles. This layout works well in both small and large spaces, offering plenty of counter space and storage. For an effective Ikea kitchen remodel, position your sink in the corner where the two walls meet. This central spot makes it easy to move between cooking and cleaning tasks.
Ikea’s corner cabinets with pull-out carousels are a game-changer for L-shaped kitchens. They make use of those tricky corner spaces, ensuring nothing gets lost in the back of your cabinets. Consider adding a breakfast bar or an island if you have extra space. Ikea’s range of movable islands can provide additional prep space and storage, and they’re flexible enough to adapt to your needs.
U-Shaped Kitchens: Ideal for Serious Cooks
If you’re a passionate cook, a U-shaped kitchen might be the perfect layout for your Ikea kitchen remodel. This design provides ample counter space and storage, wrapping around three walls. It’s ideal for creating distinct cooking, cleaning, and prep zones, allowing you to move efficiently between tasks.
To optimize this layout, place your refrigerator, stove, and sink each on a different wall, forming a practical work triangle. Ikea’s drawer systems are perfect for keeping your utensils, pots, and pans organized. Consider using wall-mounted cabinets to free up counter space. Adding a peninsula can also create a natural divide between your kitchen and dining area, making the space more functional and inviting.
Hotels Near Mercedes Benz Stadium with Stunning Views
Open-Concept Kitchens: Seamless Integration
Open-concept kitchens are perfect for those who love to entertain. This layout allows for seamless integration with your living and dining areas, creating a spacious and inviting environment. When planning an Ikea kitchen remodel for an open-concept space, consider using a large island as a focal point. It can serve as a prep area, dining space, and social hub all in one.
Ikea’s modular islands come in various sizes and styles, allowing you to find one that fits your needs perfectly. Use lower cabinets and drawers to keep your kitchenware out of sight but easily accessible. Open shelving or glass-fronted cabinets can help create a sense of openness and display your favorite dishes or cookbooks. Don’t forget about lighting – pendant lights over the island can add a stylish touch while providing necessary task lighting.
Small Kitchens: Clever Solutions for Tight Spaces
Small kitchens can be challenging, but Ikea offers clever solutions to maximize your space. For an Ikea kitchen remodel in a small area, think vertical. Use tall cabinets to take advantage of the height and create additional storage. Ikea’s pull-out pantry units are perfect for keeping your groceries organized without taking up too much floor space.
Consider a compact, wall-mounted table that can fold away when not in use. This creates a flexible dining or prep area without sacrificing valuable space. Utilize every nook and cranny with Ikea’s range of slim cabinets and pull-out organizers. These solutions help you stay organized and make your small kitchen feel much larger than it actually is.
Large Kitchens: Embrace the Space
Large kitchens offer endless possibilities for an Ikea kitchen remodel. With so much space to work with, you can get creative with your layout. An island or two can add significant functionality, providing extra prep space, storage, and seating. Ikea’s modular islands are perfect for this, offering a range of configurations to suit your needs.
Consider creating distinct zones for cooking, cleaning, and dining. Use Ikea’s drawer organizers and cabinet systems to keep everything in its place. A walk-in pantry or a wall of floor-to-ceiling cabinets can provide ample storage for all your kitchen essentials. Don’t be afraid to mix and match different Ikea collections to create a unique look that reflects your style.
Emerging Trends in Residential Construction 2024
Installation Process: Tips and Tricks for a Smooth Ikea Kitchen Installation
Embarking on an Ikea kitchen remodel is an exciting venture, but the installation process can seem a bit daunting. Don’t worry; with some handy tips and tricks, you’ll be able to transform your kitchen smoothly and efficiently. Let’s dive into the steps to ensure your Ikea kitchen installation is a success.
Plan and Prepare
Before you start installing, careful planning and preparation are essential. First, make sure you have all the necessary tools. Ikea kitchens are designed for DIY installation, but having the right tools will make the process much easier. You’ll need a drill, level, measuring tape, screwdriver, and a rubber mallet. Don’t forget safety gear like gloves and goggles!
Take a moment to review the instructions for each component of your kitchen. Ikea provides detailed guides, and it’s crucial to understand each step before you start. This will prevent mistakes and save time in the long run. Lay out all the parts and hardware to ensure nothing is missing. If you find something missing, contact Ikea immediately to get the replacement parts.
Demolition and Clean-Up
The first physical step in your Ikea kitchen remodel is to clear out your old kitchen. Remove all appliances, cabinets, and countertops. This can be a messy job, so it’s best to prepare a temporary kitchen space where you can cook and clean during the renovation. Keep the work area clean and organized to avoid accidents and confusion.
Once the old kitchen is out, inspect the walls and floors. Ensure they are in good condition and make any necessary repairs. Check for plumbing or electrical issues that might need addressing before you install the new kitchen. This is also the perfect time to paint your walls if you plan on changing the color.
Assembling Ikea Cabinets
One of the biggest parts of an Ikea kitchen remodel is assembling the cabinets. Start by assembling the base cabinets first. Follow Ikea’s step-by-step instructions carefully. A great tip is to use a rubber mallet to gently tap pieces into place without damaging them. Lay down a soft blanket or cardboard to protect the cabinet parts from scratches during assembly.
When assembling drawers and doors, ensure they are aligned correctly. This will make installation smoother and ensure that everything fits perfectly. Use a level to check that the cabinets are even and adjust the legs if necessary. Properly leveled cabinets are crucial for the stability of your countertops and overall kitchen structure.
Installing Cabinets
After assembling, it’s time to install your cabinets. Begin with the upper cabinets, as they are easier to mount without the lower cabinets in the way. Use a level and a stud finder to ensure the cabinets are securely attached to the wall. Ikea provides a suspension rail system that simplifies the installation process. It’s a handy feature that allows for easy adjustments before finalizing the position.
For base cabinets, line them up according to your kitchen layout plan. Secure them to the wall and to each other for stability. Don’t rush this step; proper alignment is key to a seamless kitchen finish. Use clamps to hold cabinets in place while you secure them. Remember to leave space for appliances, as indicated in your layout plan.
Installing Countertops
Now that your cabinets are in place, it’s time to install the countertops. Measure twice, cut once! This old saying holds true when working with countertops. If you’re using Ikea countertops, they can often be customized to fit your kitchen. Use a jigsaw or circular saw for precision cuts. Sand the edges smoothly to avoid any rough spots.
When placing the countertops, ensure they are level and secure them with brackets or screws. If you’re installing a sink, cut out the sink hole according to the template provided. Use silicone caulk around the edges to create a watertight seal. Don’t forget to seal any joints between countertop pieces to prevent water damage.
Plumbing and Electrical Work
If you’re confident in your DIY skills, you might tackle plumbing and electrical work yourself. However, hiring a professional can ensure everything is up to code and prevent potential issues. For plumbing, connect your sink, dishwasher, and any other appliances. Check for leaks and ensure all connections are secure.
For electrical work, install lighting fixtures and connect your appliances. Ensure that all outlets are properly grounded and follow Ikea’s guidelines for installing under-cabinet lighting. If you’re adding a kitchen island with electrical outlets, this is the time to install those connections.
Finishing Touches
You’re almost there! The final steps in your Ikea kitchen remodel are all about the finishing touches. Install handles and knobs on your cabinets and drawers. Ikea offers a variety of styles, so choose ones that match your kitchen’s design. Make sure they are evenly spaced and securely attached.
Add any remaining accessories, such as shelves, organizers, and back splashes. Ikea’s range of kitchen accessories can help you maximize storage and keep your kitchen tidy. Take your time with these details, as they can make a significant difference in the overall look and functionality of your kitchen.
Maintenance Tips: Keeping Your Ikea Kitchen Looking New for Years to Come
So, you’ve completed your fabulous Ikea kitchen remodel and everything looks pristine. But how do you keep it looking new for years to come? With a little bit of regular maintenance and some smart tips, you can ensure your kitchen stays as beautiful as the day it was installed. Let’s explore some easy, effective ways to maintain your Ikea kitchen.
Regular Cleaning: The Key to Longevity
The first step to keeping your Ikea kitchen looking new is regular cleaning. A clean kitchen not only looks good but also functions better. Start by wiping down your cabinets and countertops daily. Use a soft cloth and a gentle cleaner to avoid scratching surfaces. Ikea’s cabinets and countertops are designed to be durable, but gentle cleaning is always best.
For your countertops, avoid harsh chemicals that can damage the finish. A simple mixture of water and mild dish soap works wonders. Wipe up spills immediately to prevent stains, especially with porous materials like wood or stone. Regularly cleaning your sink and fixtures with a non-abrasive cleaner will keep them shiny and free from buildup.
Protecting Surfaces: Preventing Damage
Protecting your surfaces is crucial to maintaining the new look of your Ikea kitchen remodel. Use cutting boards for chopping and trivets for hot pots and pans. This prevents scratches and heat damage to your countertops. While Ikea’s surfaces are designed to be resilient, a little extra care goes a long way.
Avoid dragging heavy items across your countertops to prevent scratches. If you have a wooden countertop, apply a food-safe oil regularly to keep it conditioned and prevent it from drying out. For laminate surfaces, be mindful of edges where water can seep in and cause swelling. Simply wiping up water quickly can help avoid this issue.
Cabinet Care: Keeping Doors and Drawers Pristine
Your Ikea cabinets are the stars of your kitchen, so keeping them in top condition is essential. Regularly check for loose hinges or handles and tighten them as needed. This prevents damage from doors or drawers that are not aligned properly. If you notice any squeaks, a small drop of lubricant can do wonders.
Clean your cabinet doors with a soft, damp cloth. Avoid using excessive water, which can damage the finish. For tougher stains, a mild soap solution is usually enough. Always dry surfaces thoroughly to prevent moisture damage. For glass-fronted cabinets, use a glass cleaner to keep them sparkling and clear.
Appliance Upkeep: Ensuring Efficiency
Your kitchen appliances are workhorses, and they need regular maintenance to keep performing well. For your refrigerator, clean the coils every six months to ensure it runs efficiently. Check door seals and replace them if they are worn out to maintain optimal cooling.
For your dishwasher, regularly clean the filter and run a cleaning cycle with a dishwasher cleaner to prevent buildup. Ensure your oven is clean inside and out. Wipe spills immediately and use the self-cleaning function if available. Keeping your appliances in good shape not only extends their life but also keeps your kitchen running smoothly.
Handling Wear and Tear: Quick Fixes and Repairs
Even with the best care, everyday use can cause wear and tear. Knowing how to handle small repairs can keep your Ikea kitchen remodel looking fresh. For minor scratches on your cabinets or countertops, use a touch-up kit that matches the material. Ikea often provides these for their products.
If you notice a drawer or door that doesn’t close properly, check the alignment and adjust as necessary. For larger repairs, don’t hesitate to consult Ikea’s customer service or a professional. Taking care of issues promptly prevents them from becoming bigger problems later on.
Seasonal Deep Cleaning: A Fresh Start
In addition to regular maintenance, schedule a deep cleaning session every few months. This involves cleaning behind appliances, washing cabinet interiors, and scrubbing hard-to-reach areas. Use this time to declutter and reorganize your kitchen. A clean, organized space not only looks great but also makes cooking and cleaning more enjoyable.
During your deep cleaning, check for any signs of damage or wear that need addressing. This is a great time to apply any needed treatments to your countertops or cabinets. By dedicating a bit of time each season, you ensure your Ikea kitchen remains in top condition year-round.
Keeping It Fresh: Updating Your Kitchen
To keep your Ikea kitchen remodel feeling fresh, consider small updates over time. Changing out hardware, such as handles and knobs, can give your cabinets a new look. Adding new accessories or reorganizing your storage can also breathe new life into your kitchen.
Consider refreshing your decor with new curtains, rugs, or a fresh coat of paint on the walls. These simple changes can make your kitchen feel updated without a full remodel. Ikea offers a wide range of affordable options, making it easy to keep your kitchen stylish and functional.
Enjoy Your Kitchen
Maintaining your Ikea kitchen remodel doesn’t have to be a chore. With regular cleaning, protective measures, and a few smart habits, you can keep your kitchen looking new for years to come. Enjoy the space you’ve created and take pride in the beauty and functionality of your Ikea kitchen. After all, a well-maintained kitchen is a happy kitchen!
By following these maintenance tips, you ensure that your investment in an Ikea kitchen remodel continues to pay off. A little effort goes a long way in preserving the charm and efficiency of your kitchen, making it a delightful place to cook, eat, and gather with loved ones. So roll up your sleeves, keep your kitchen sparkling, and enjoy the fruits of your labor!
3 comments on “The Ultimate Guide to Ikea Kitchen Remodel”